Introduction
If you are responsible for administering Teams within your organisation, you’ve almost certainly come across the Teams PowerShell module. It is used for pretty much all admin and configuration tasks within Teams.
If something can be done in the Teams Admin Center (TAC), it will almost certainly be able to be achieved in Teams PowerShell - and in many cases only in Teams PowerShell. And - if you are like me - when running repeatable tasks or commands, I think automation and hence this article.
TL;DR
The Teams PowerShell module uses an underlying API that only seems to work with permissions granted to a signed in user, and not permissions granted to an application e.g. using a client secret. There are scenarios where you may want to run the Teams PowerShell module unattended (not run by yourself) and this is covered in more detail below.
Background
Whenever you make a change in the TAC or run a command in the Teams PowerShell module, this is run against the Skype and Teams Tenant Admin API. This is NOT an API like Microsoft Graph API that you should call directly against. Instead, it is not documented, supported by Microsoft and could change at any time without notice. Instead, you should use Microsoft’s tooling like TAC or Teams PowerShell that are wrappers for this API - these are supported.
As an example, when loading the user list in TAC, the aforementioned API (at api.interfaces.records.teams.microsoft.com) is called:

The same API would be used when running something like Get-CSOnlineUser, but this is abstracted away.
With all of this in mind, we will now touch on how we can use the tooling we have, but automate it (and NOT use the API directly).
What is possible
Before you get too excited - and you may have encountered this yourself - there is no way to use the Teams PowerShell module AND run commands without a signed in user.
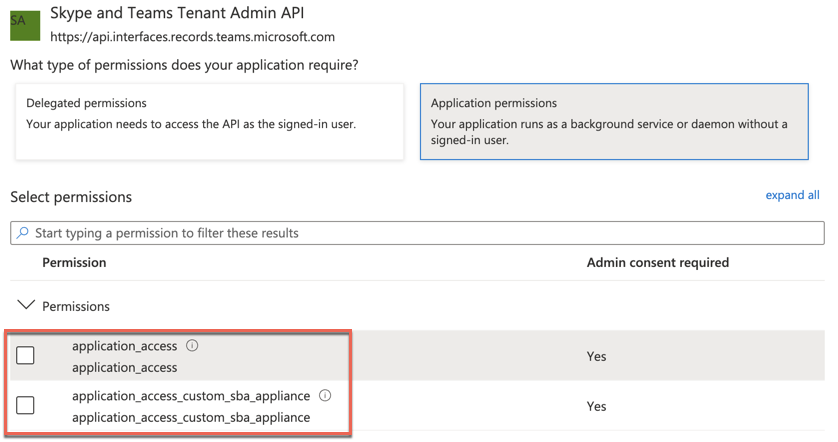
There are application permissions against the API (not requiring a signed-in user), but these do not seem to do anything with the PowerShell module and I suspect used in different scenarios.
Instead, we will focus on the delegated permissions (requiring a signed-in user).
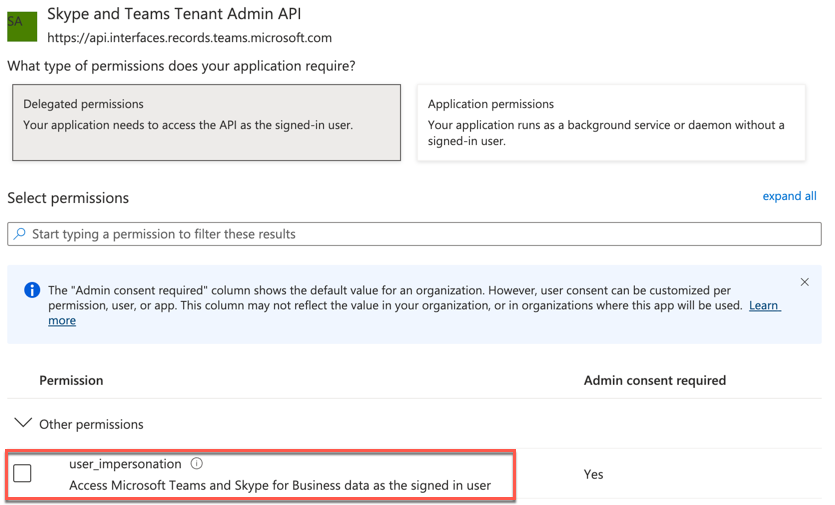
But, if I have to sign-in, how is this unattended? How does this help me? Well, it all depends on what you are looking to do. Here are some common scenarios to consider:
Run commands away from signed-in user
One scenario could be you want to run PowerShell commands on request, but abstract the commands away from a user. Let’s say the user could login to a webpage, click a button and in the background, a PowerShell command is run, with the result returned to the user.
This is essentially replicating what someone could do in TAC by clicking buttons and APIs being called, but we are calling the API using PowerShell.
One benefit of using this approach is that you can build/integrate the required API calls into your own application/workflows instead of granting a user access to the TAC to do one small task.
Run commands on a schedule
Another common scenario is wanting to run a command, or most likely a script with multiple commands on a schedule.
For example, let’s say you want to backup how certain parts of Teams are configured on a regular basis - the commands are available for this.
The issue here is we need a signed in user to have permission to do this, and most likely the user won’t want to authenticate each time the script runs. Outside of saving a username/password and authenticating with it, which is a really, really bad idea it will be difficult.
But not impossible. One workaround could revolve around refresh tokens. When being issued an access token (we will cover this in more detail shortly), a refresh token is also issued. This then allows us to refresh the access and refresh tokens with the current refresh token.
As long as the frequency of the schedule is less than 90 days (default refresh token lifetime) it should work something like this:
- User signs in and gets access and refresh token
- Store refresh token for next time script is run
- Script runs and uses refresh token to get access token and new refresh token
- Access token is used to call API
- Go to step 2
This concept isn’t too dissimilar to someone signing in to a website and not being promoted to sign in as long as the site is used often enough.
How does it work?
The Teams PowerShell module supports two way to authenticate:
Interactive authentication
Connect-MicrosoftTeams
You will be prompted to sign in on a webpage from the module. The module will then connect to Teams once you have signed in. This is the default behaviour you are most likely familiar with, but not very useful if you want to use the module unattended.
Access token authentication
Connect-MicrosoftTeams -AccessTokens @($GraphToken, $TeamsToken)
This is really what this blog post is all about. Instead of having a user manually authenticate every time you want to connect to Teams, you can provide two access tokens without a user having to do anything.
Why two access tokens? Great question. It would appear the Teams PowerShell module is a wrapper for two APIs (Microsoft Graph and the aforementioned Skype and Teams Tenant Admin API), so for us to authenticate, we need to provide both.
As for how you get the two access tokens, that is up to you to decide (not handled by the module), but please, for all that is holy, do not follow the documented example from the module with a secrets/passwords stored in the script. In-fact, let’s not use a secret or password at all, hmm? (I will show you how below).
Once you provide the two access tokens, it will authenticate and function as you would expect - all commands I have tried worked using access tokens.
Bringing it all together
Finally, let’s walk through a working example of this. Of course, this is not the only way to do this, but its something that works for me in a (I think) suitable “production” way.
In this scenario I am running a script on a daily schedule that will list Teams users. Not a terribly useful script it must be said, but it demonstrates what is possible (you can substitute this for whatever you want your script to do).
One wrinkle I’ve added to this is to run it from an Azure Automation Runbook. Sure, I could run it locally, or in an Azure Function, but I think a Runbook is a quick and easy way for someone to quickly start automating PowerShell scripts.
Let’s now quickly go through the setup and how it works.
App registration
First thing is to create an Azure AD App registration with the permissions required across the two access tokens.
- Give it a useful name
- No redirect URI
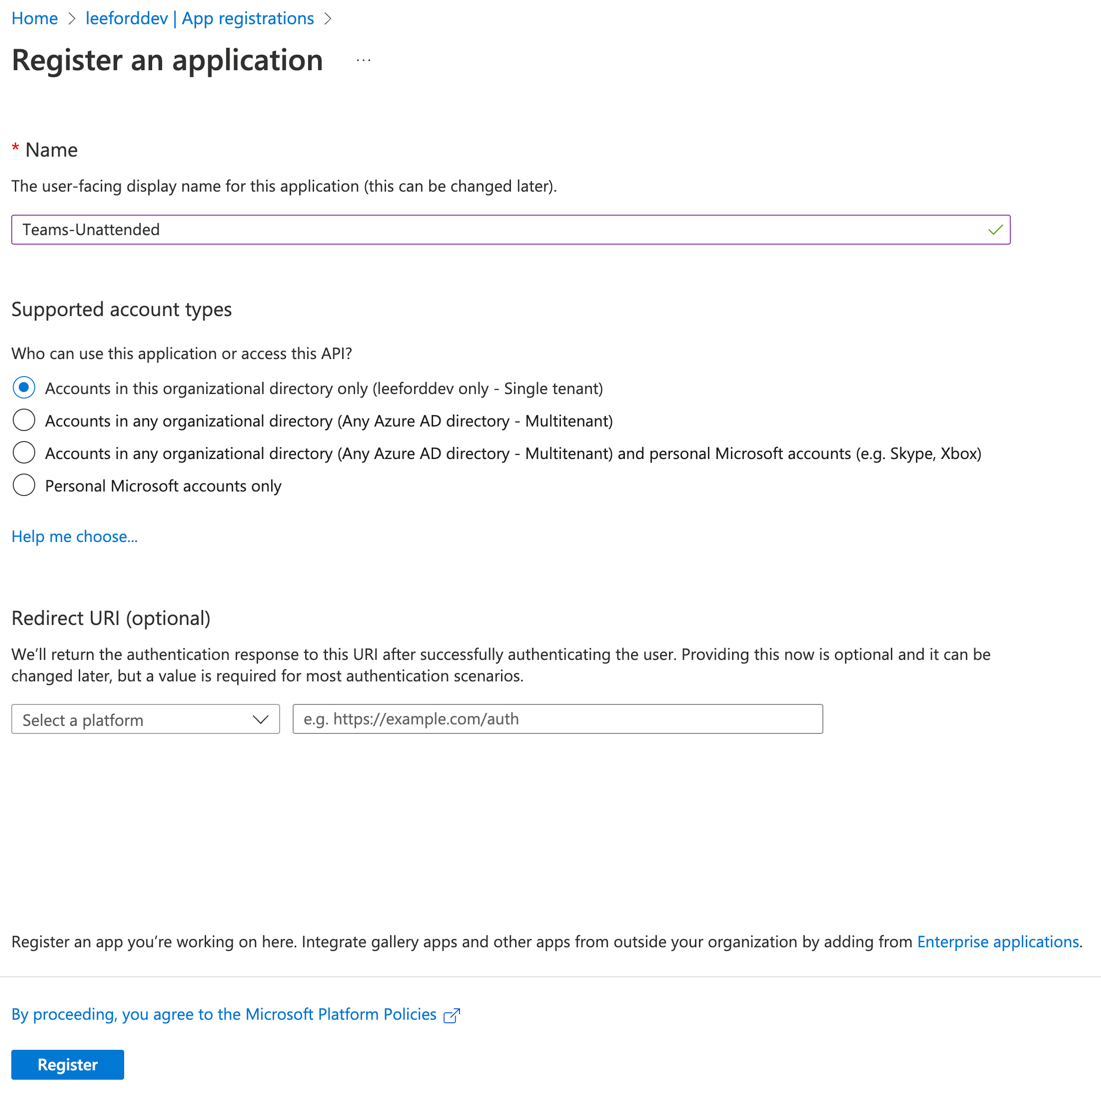
Take note of the application/client ID and tenant ID

Add the following API permissions:
| API | Grant type | Permission |
|---|---|---|
| Microsoft Graph | Delegated | offline_access |
| Microsoft Graph | Delegated | User.Read.All |
| Microsoft Graph | Delegated | Group.ReadWrite.All |
| Microsoft Graph | Delegated | AppCatalog.ReadWrite.All |
| Skype and Teams Tenant Admin API | Delegated | user_impersonation |
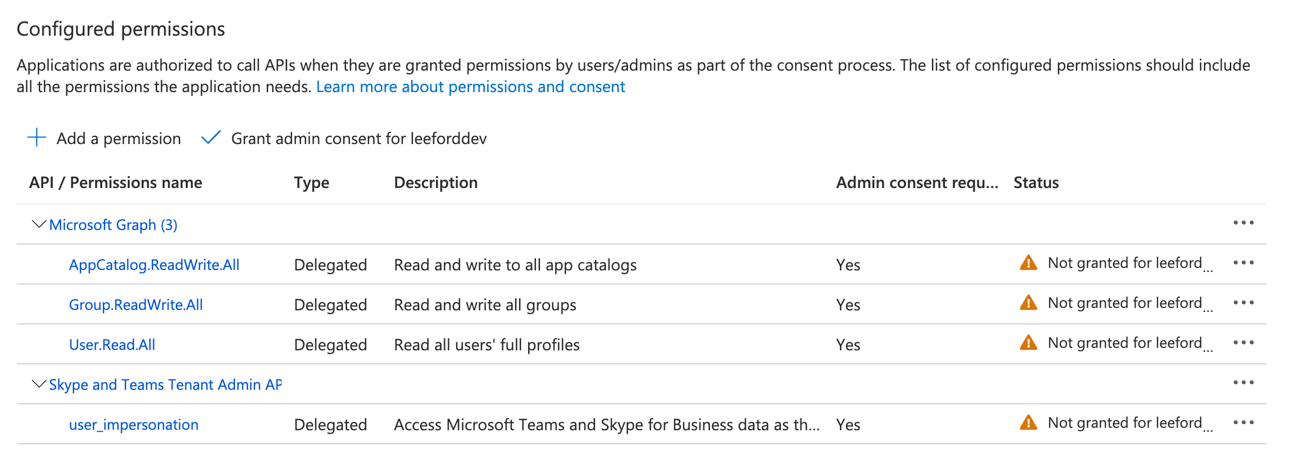
That’s it for the App registration!
Azure Automation
Either create a new or use an existing Azure Automation account.
Install module
You need to ensure you add the MicrosoftTeams module to the account.
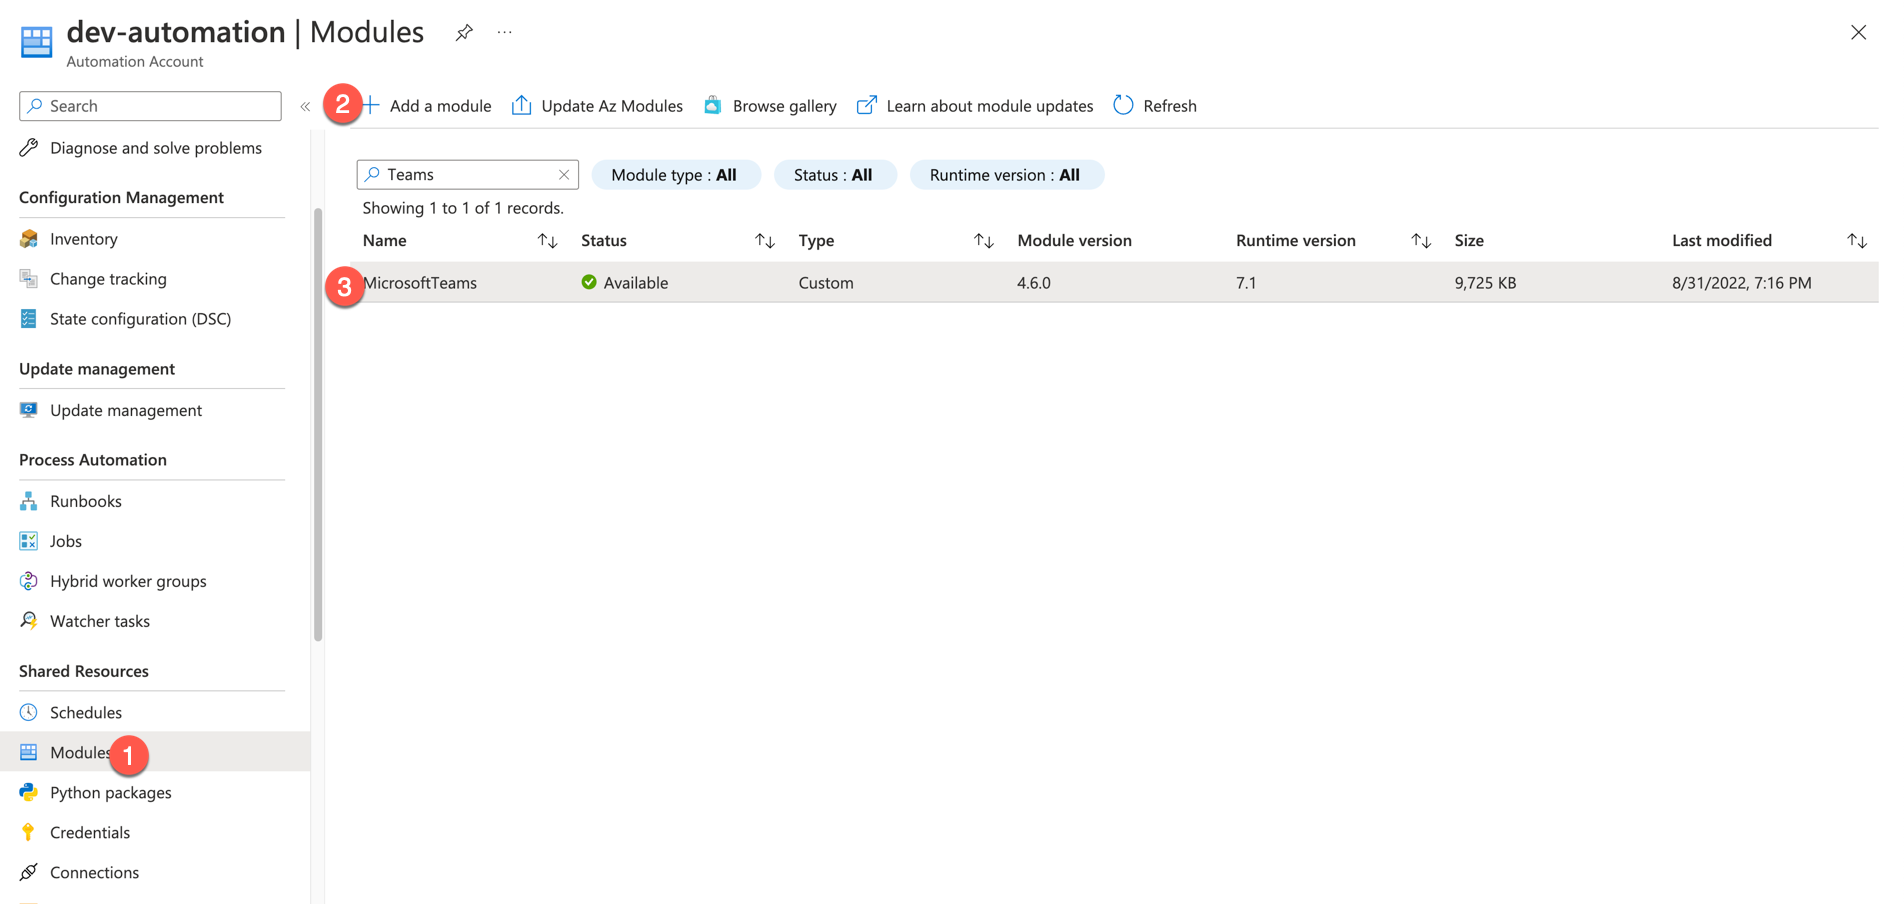
Variables
Right, next step is to add some variables. The variables are used to store values outside of the script, but can be called up on at runtime. We need to add the following:
| Name | Type | Value | Encrypted |
|---|---|---|---|
| refreshToken | Not specified | Yes | |
| clientId | String | Client ID from App registration | Yes |
| tenantId | String | Tenant ID from App registration | Yes |
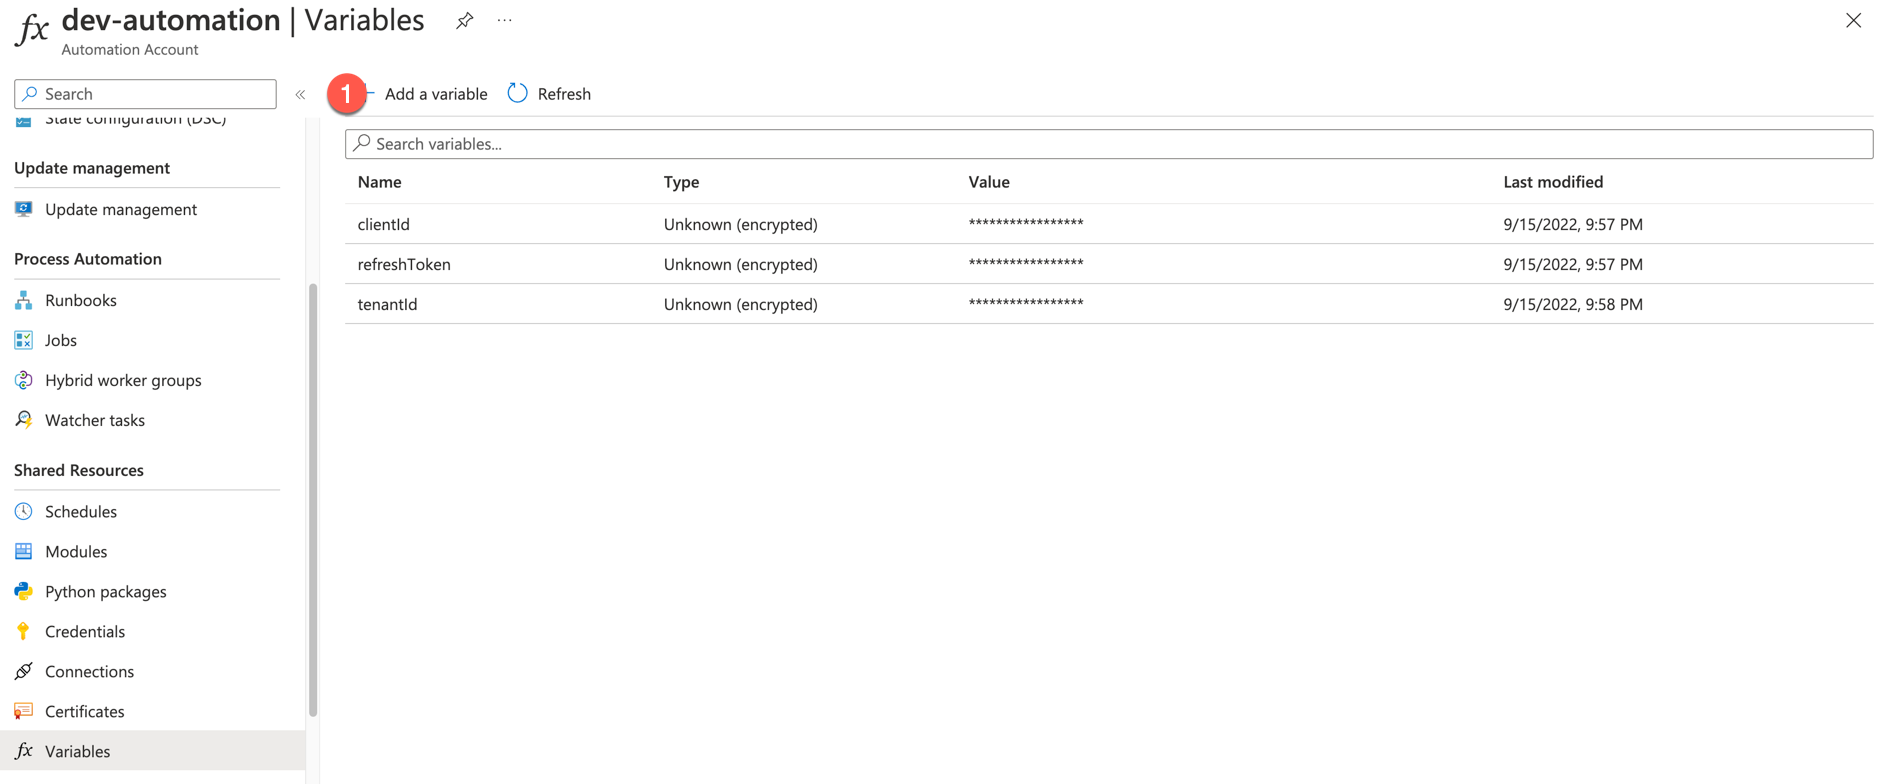
By adding the refresh token variable, we can now use it at runtime to obtain the two required access tokens.
Fun fact: Did you know you can obtain an access token against any Azure AD resource (you have permission to access) from any Azure AD refresh token? In this example, we store a refresh token for Graph, but also use it against the Skype and Teams Admin API.
Runbook
The final step is to create a Runbook that will run a PowerShell script (on demand or triggered).
Because I am kind, I have shared a sample Runbook on my GitHub. So you can import this.
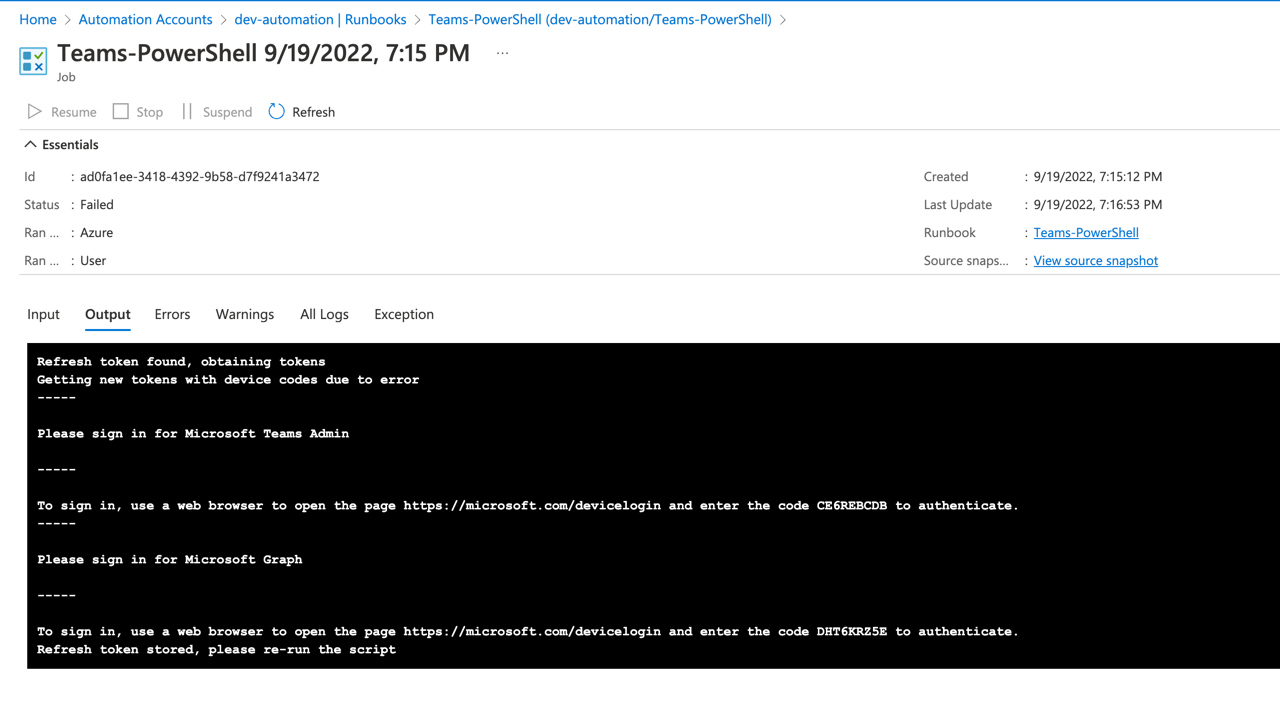
Now run the Runbook. As it hasn’t authenticated before, we do need to authenticate for the first run. So follow the instructions and sign in via a browser for BOTH resources.
Even though we only store one refresh token for both resources, there is no way that I can see to consent for both resources using device code auth flow, so instead, consent is asked for separately.
Once signed in, you should see a message that the token has been stored.
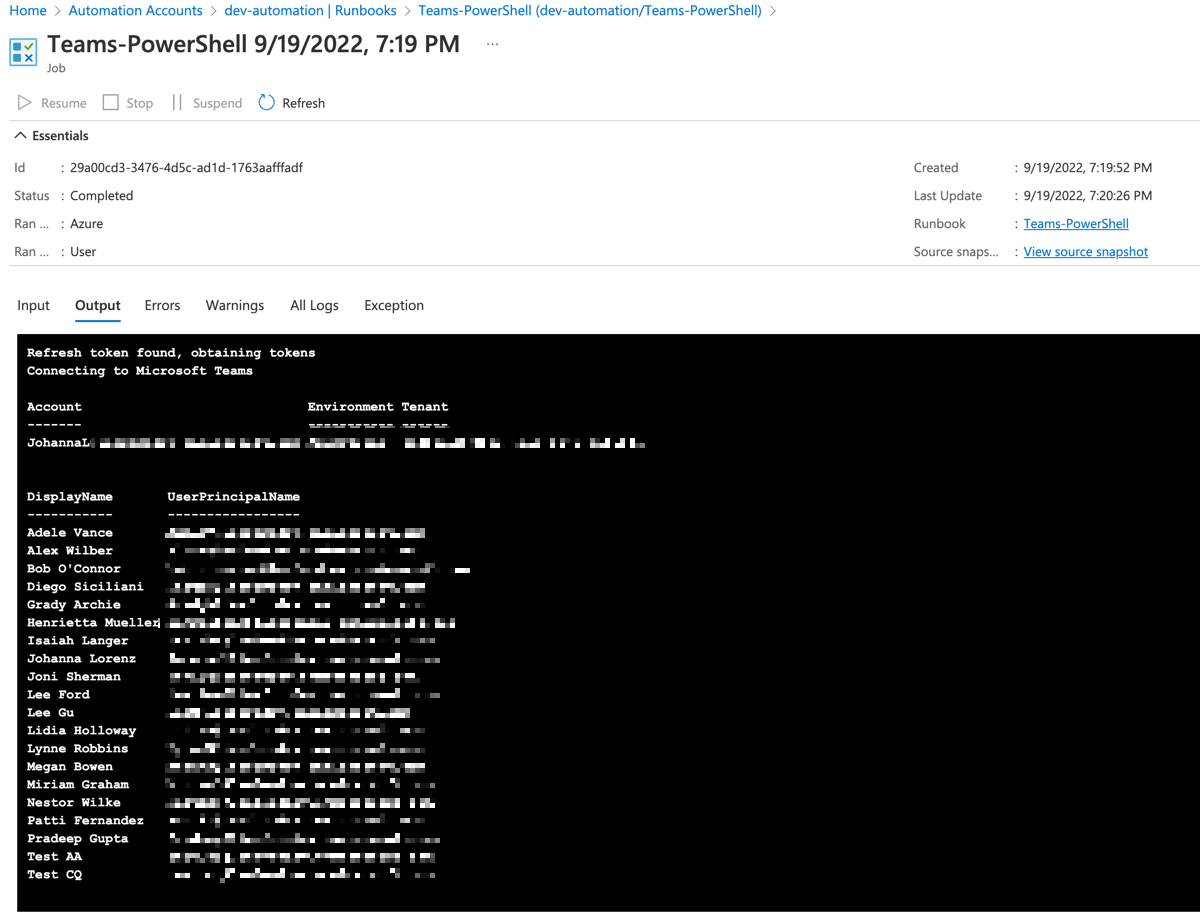
And finally, if you run the Runbook again, the refresh token should be found and the script returns a list of Teams users - yay!
And that’s it. I hope you found this article useful!