Deploying AudioCodes vSBC in Azure the easy..ish way
Edit 09/07/18 - There is now an easier, supported method to achieve this here.
Introduction
For a while, I’ve been running SBCs and other virtual machines for my lab on physical servers, which consume a fair bit of power and most of the time sit there unused. I’ve managed to move other machines to Azure but wanted to also move an AudioCodes SBC too. One thought when Direct Route arrives, I could have a whole PSTN calling lab in Azure to play with.
Looking around whilst writing this I did come across Jeremy Silber’s blog post about a similar topic. We have gone about it in different ways, but its worth a read.
One thing to note right away, this is not supported by Microsoft or AudioCodes. For a lab environment it’s fine, but for production, you’re on your own!
To do this we are going to deploy a Hyper-V image on an on-premises Hyper-V host, then migrate to Azure using Azure Site Recovery (ASR). As long as you complete the migration within 30 days, you will not be billed for ASR. Once the SBC is running in Azure you will be billed the normal costs to host a VM.
By using the ASR, we can do the following:
- No need to use PowerShell or use PowerShell scripts/templates
- No need to convert from a VHDX or VMDK file to a VHD.
- No need to upload VHDs. If we make a change to the on-premise once uploaded, ASR will sync the changes.
- Using failover testing, we can run the on-premises and Azure SBC side-by-side. This allows us to test and make changes if required without having to start over.
Step 1 - Download AudioCodes vSBC
If you go to the AudioCodes support site, there should be a listing for Mediant Virtual Edition SBC. Download the latest 7.2 Hyper-V image and the latest 7.2 maintenance release (.cmp file).
Step 2 - Deploy Hyper-V image
This will need to be done on a Hyper-V 2012 R2 or later server. Although we can deploy the Hyper-V image to a Windows 10 machine, Azure ASR will not run on it.
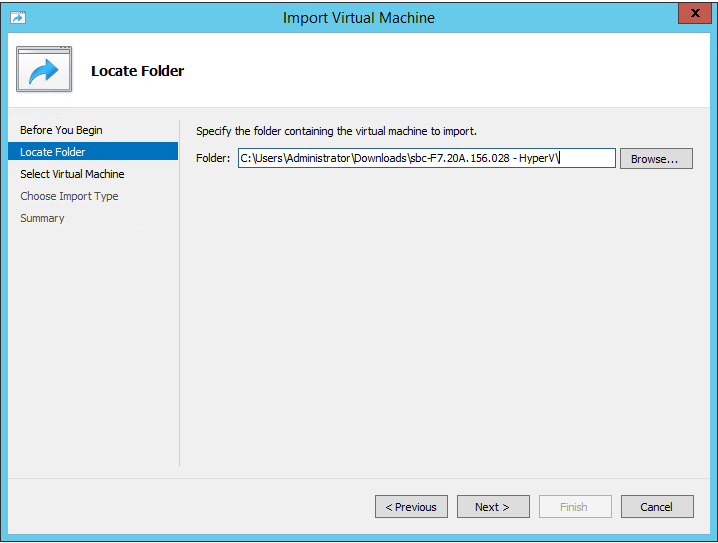
Once the zip file has been extracted somewhere, open Hyper-V manager and select Import Virtual Machine. Locate the folder where you extracted the zip file to:
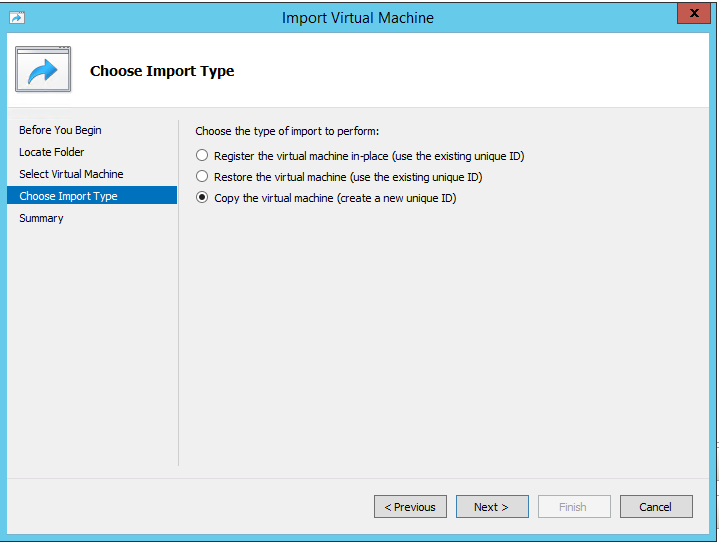
When prompted to choose Import Type, select “Copy the virtual machine (create a new unique ID)”:
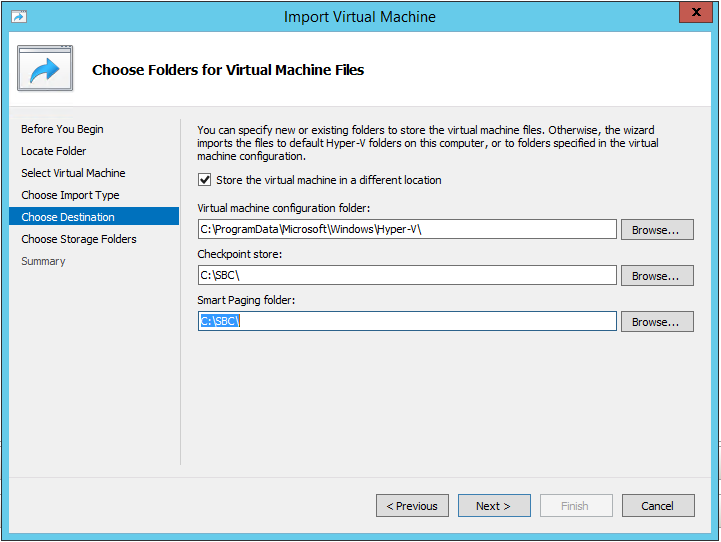
Now, select the location of related files for the virtual machine:
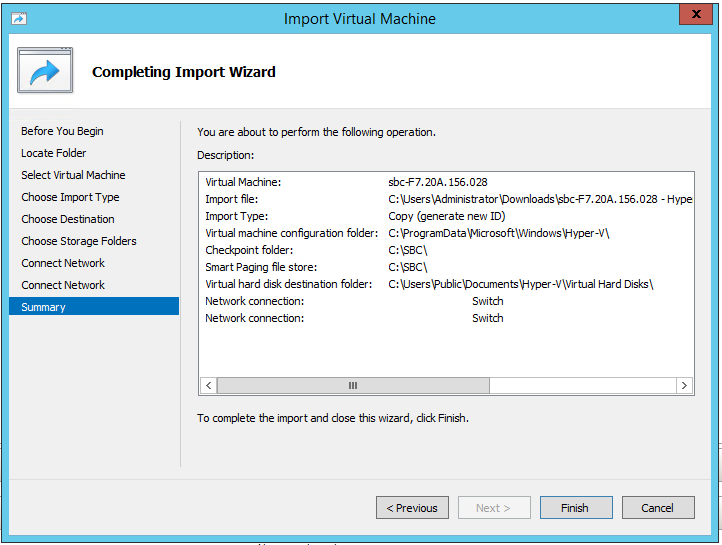
Select where to store the Virtual Disk, what vSwitches to use for each Network Adapter and click Finish. Ideally, you want to specify different vSwitches so you know which is which is which when we land in Azure:
Once deployed, start the virtual machine and connect to the console of it.
You should be prompted for a username and password - both are “Admin”.
We now need to enter the configuration mode by typing “enable” and entering the enable password - again,“Admin”. You should now be presented with a “Mediant SW#” prompt.
Now configure the network interface. Follow my example, but change the IP address, mask and gateway to suit - this needs to be accessible from your local network.
Mediant SW# configure network

Mediant SW(configure-network)interface network-if 0

Mediant SW(network-if-0)# ip-address 192.168.141.222

Mediant SW(network-if-0)# gateway 192.168.141.1

Mediant SW(network-if-0)# prefix-length 24

Mediant SW(network-if-0)# activate
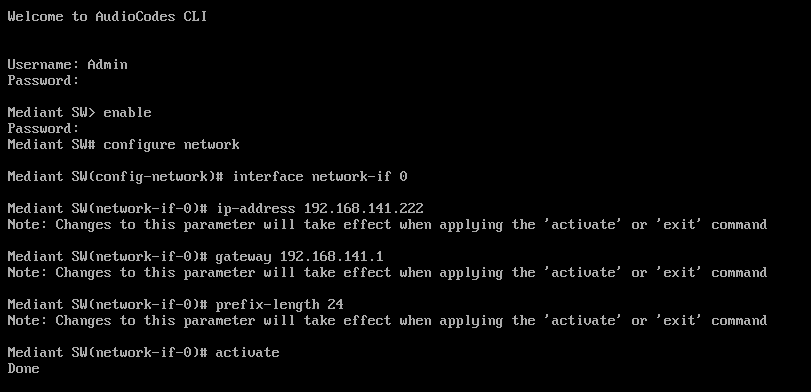
Once complete, exit the configuration and reboot the SBC:
Mediant SW(network-if-0)# exit

Mediant SW(config-network)# exit

Mediant SW# reload now
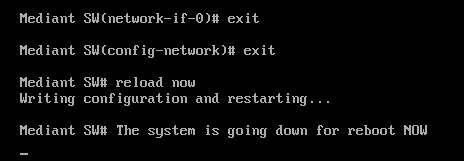
Step 3 - Prepare SBC for Azure
After the reboot web-browse the IP address you assigned and select Actions > Software Upgrade. Choose the .cmp you downloaded earlier, and reset the SBC:
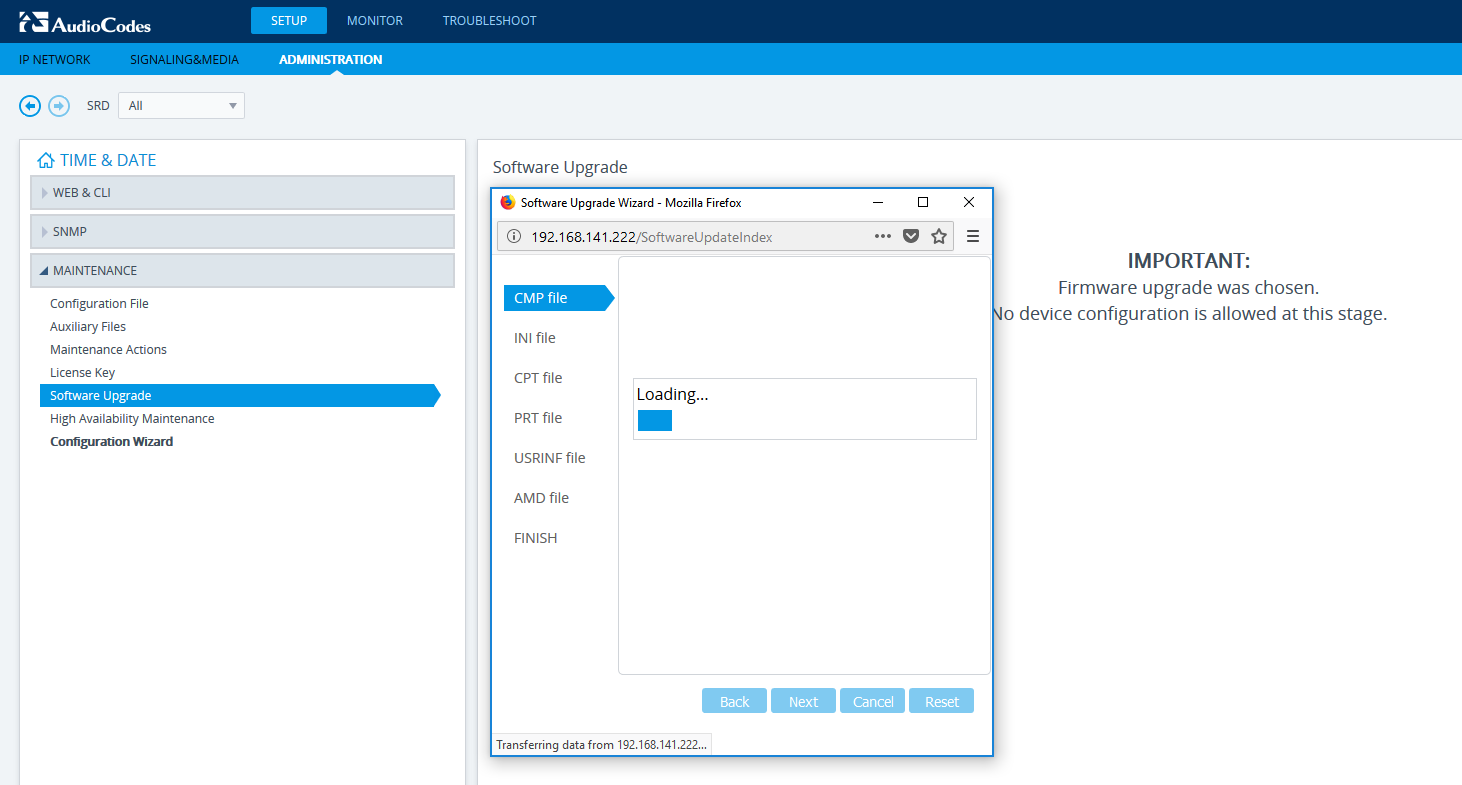
Once it comes back from the update, we are now ready to move to Azure. Don’t worry that the SBC is on the wrong IP address for Azure, we will handle that later.
Step 4 - Setup Azure ASR
Once you are signed in to the Azure portal, we need to create a Recovery Vault (if you don’t already have one). I’m assuming you already have the following:
- A Virtual Network configured with an address space and subnet for use with the SBC LAN interface.
- A Windows machine on the same subnet as the SBC LAN interface so we can administer it from Azure.
Select “Backup and Site Recovery (OMS)” from the marketplace. Give it a name and assign it a subscription, resource group and location.
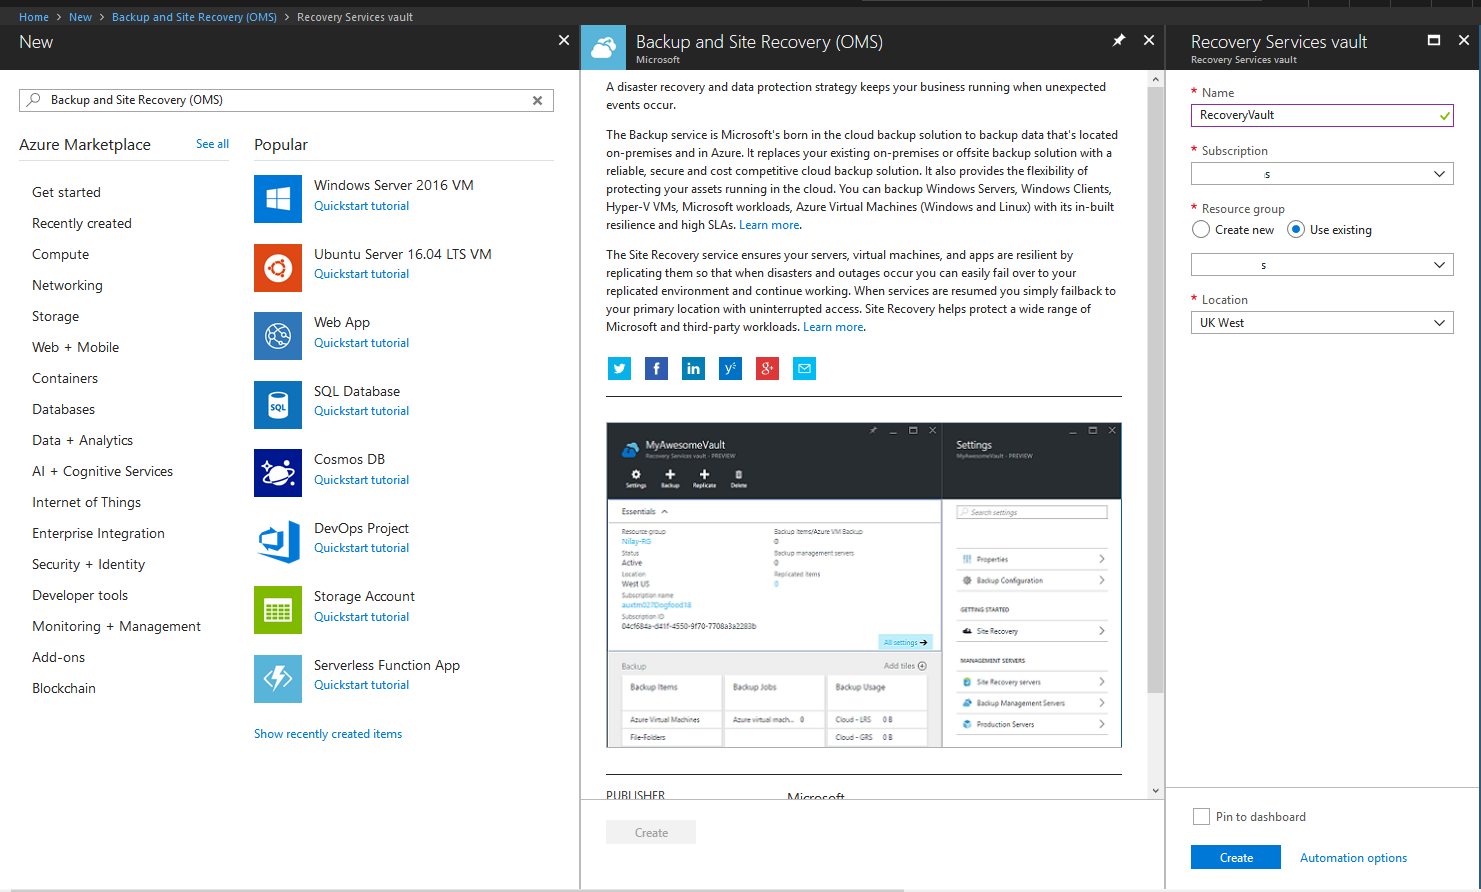
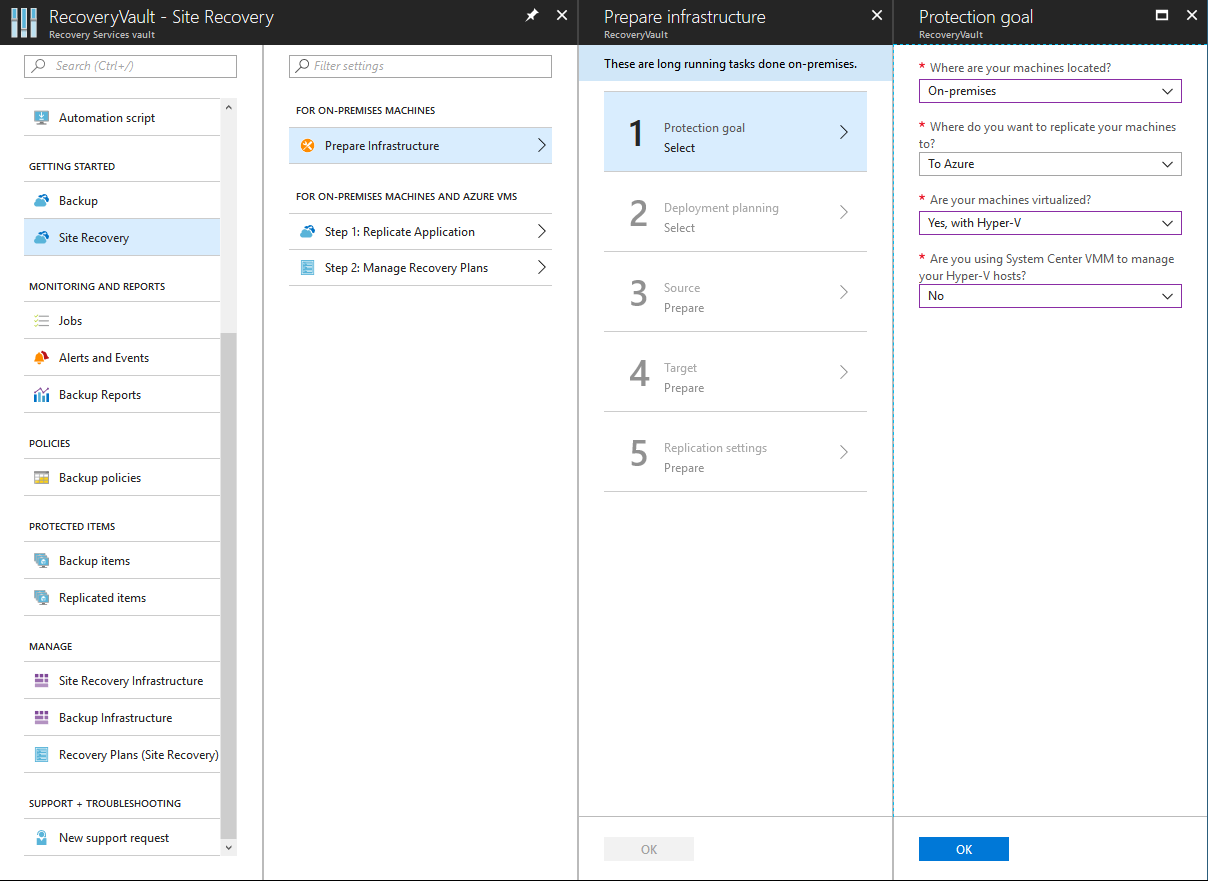
Once created, navigate to the Recovery Vault. Select “Site Recovery” under “Getting Started” and then select “Prepare Infrastructure”. Under Step 1, specify your machines are currently on-premises, you want to move them to Azure, they are running on Hyper-V and whether you are using VMM (if you are, select that):
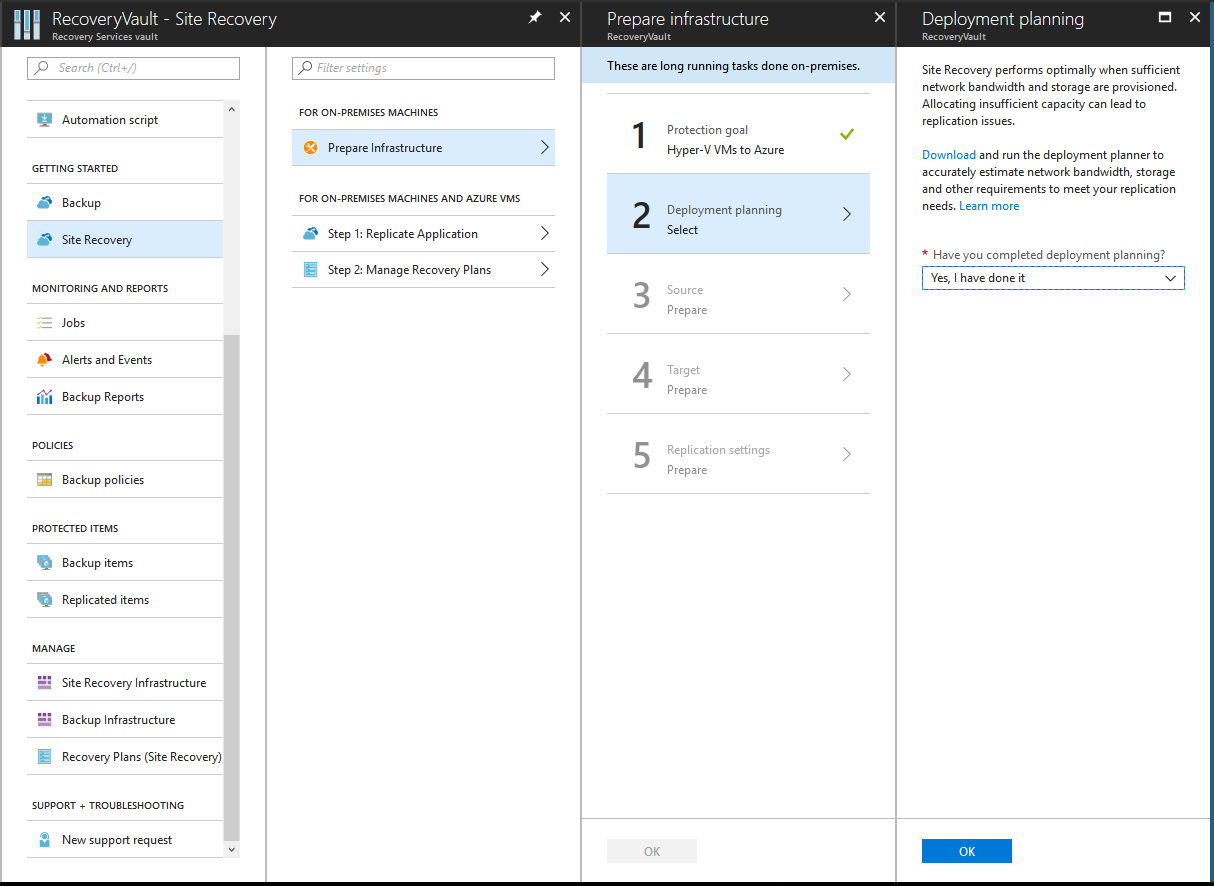
Now, let’s confirm we have done deployment planning (I skipped this, but for real, production servers you want to do this).
Create a Hyper-V site and give it a name. Then add a Hyper-V server by following the steps:
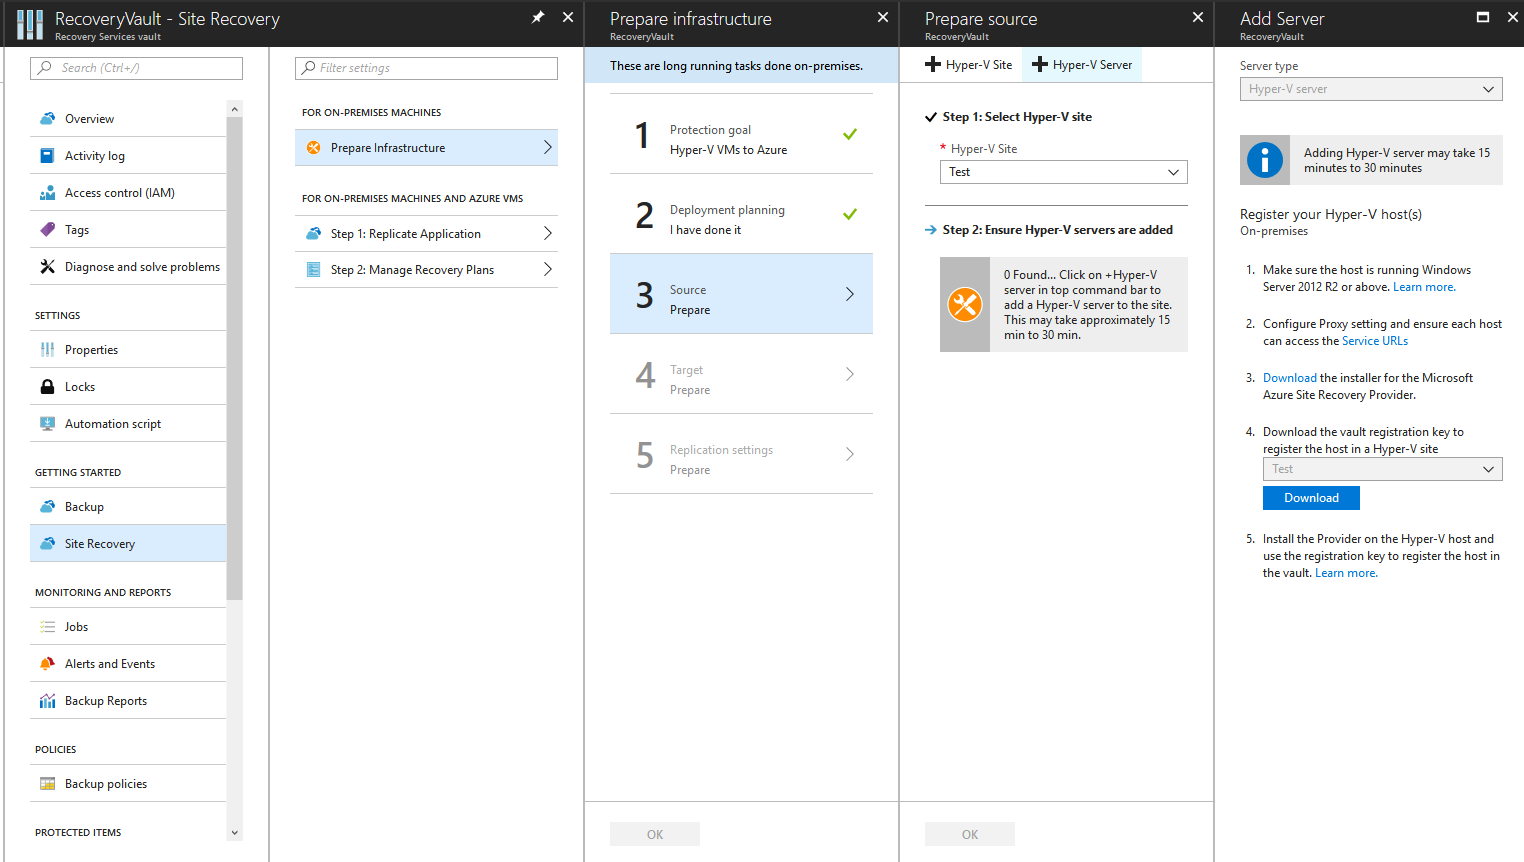
You will need to download the Azure Site Recovery Provider and the registration key.
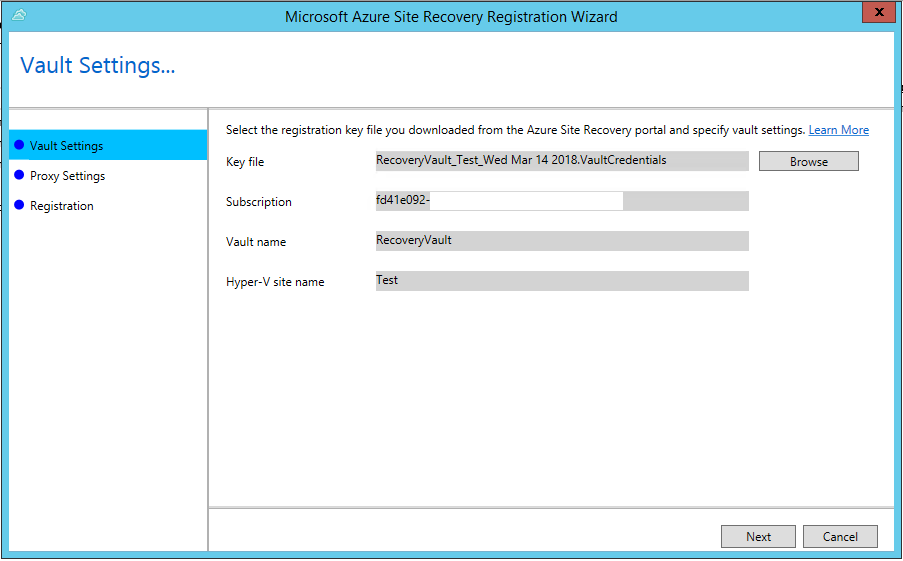
From the Hyper-V server, install the Azure Site Recovery Provider and when prompted add the key:
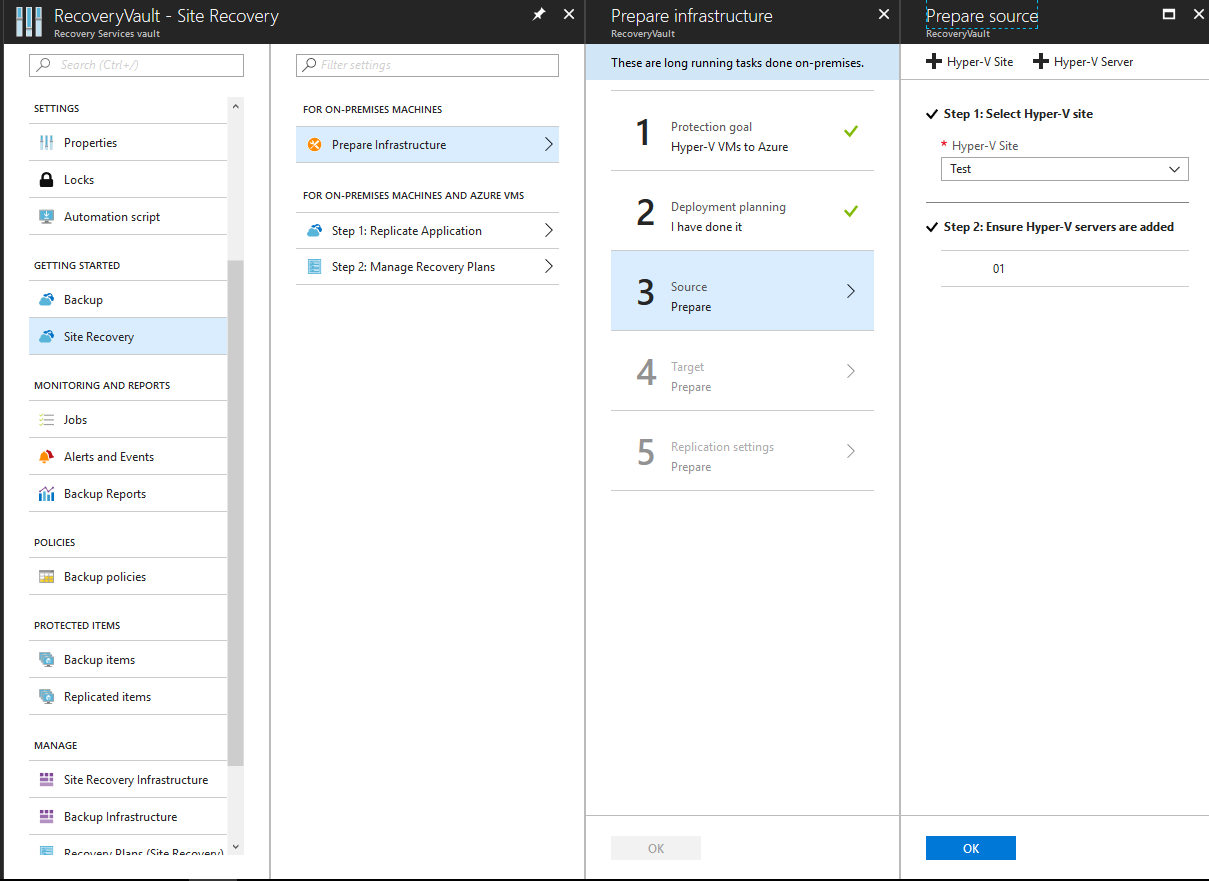
Once installed, give it a few minutes and wait for the Hyper-V server to appear (you may need to click Step 3 for it to appear):
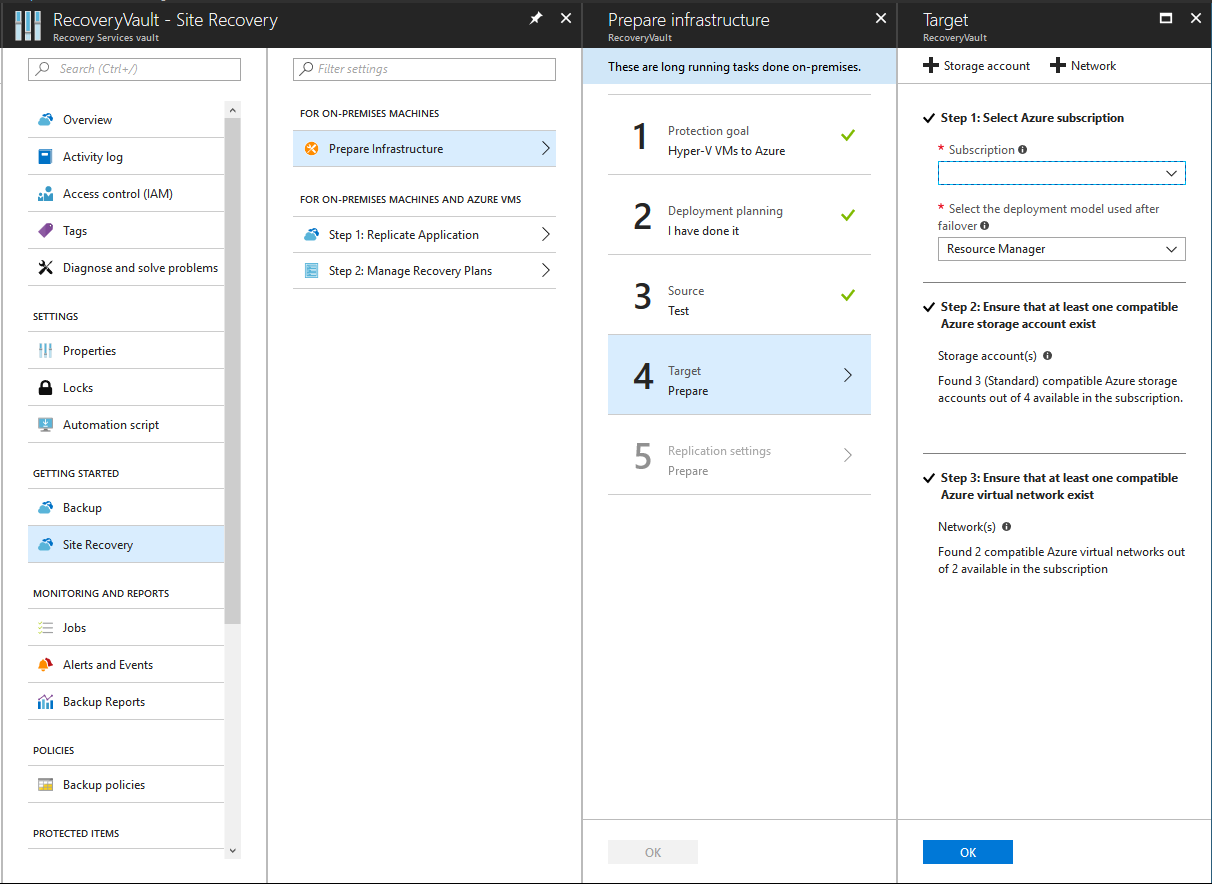
Select the correct subscription and deployment model as Resource Manager:
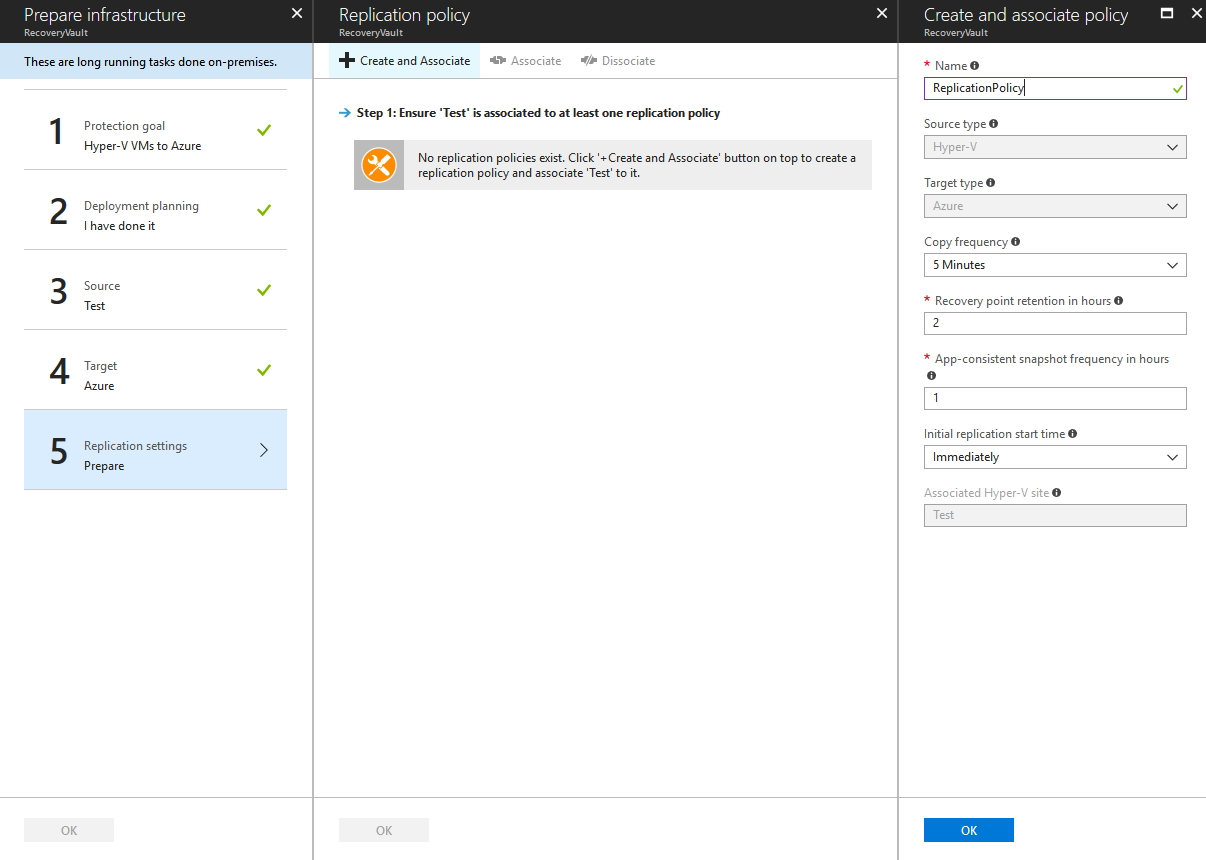
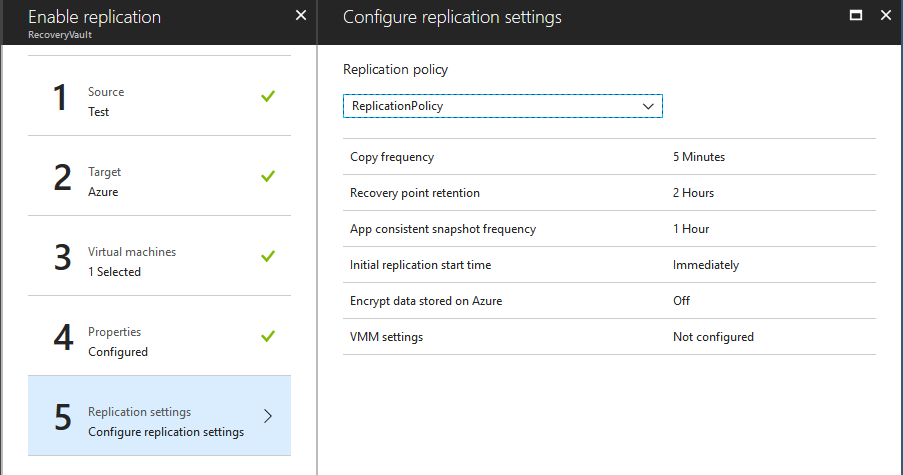
Create a replication policy. I’ve left mine as the default settings:
Now the vault has been set up for replication.
Step 5 - Check VNet is compatible
Before we can start the replication, we need to make sure we have two subnets and address spaces configured in the VNet we are using - one for the LAN and one for the DMZ:
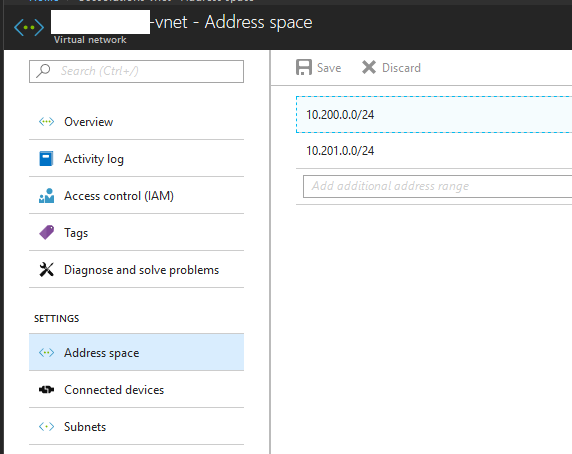
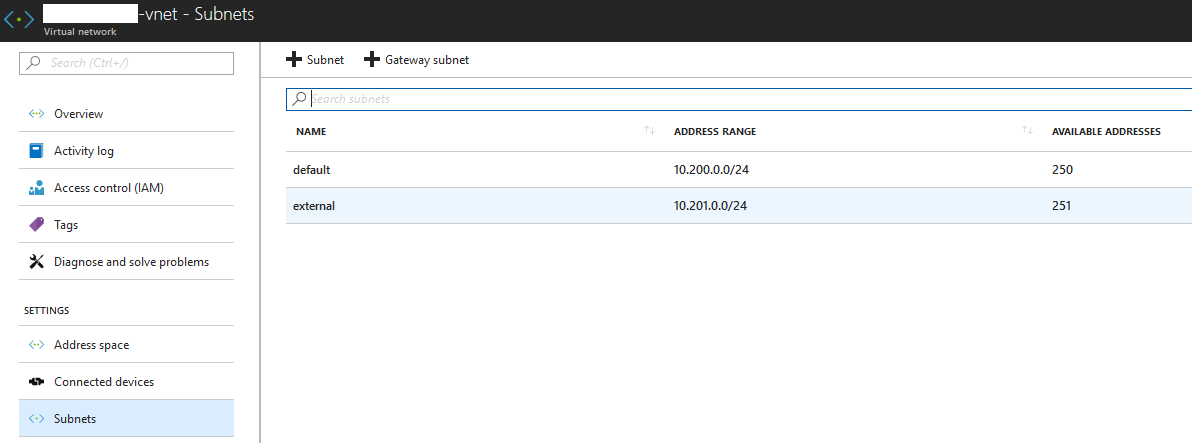
As you can see, I have a subnet called “default”, this is on my LAN side. I also have a subnet called external, this will be used for my DMZ side.
Whilst we’re here, let’s see what IP addresses are currently in use, we will need one on each subnet:

Note: .1-3 are normally reserved and cannot be used.
Step 6 - Setup replication of the SBC
We should now be at a stage to add the SBC for replication.
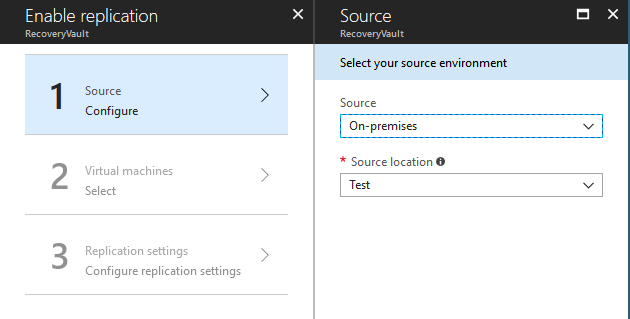
From the recovery vault, click Replicate. First, we configure the source. Select on-premises and the Hyper-V site we created:
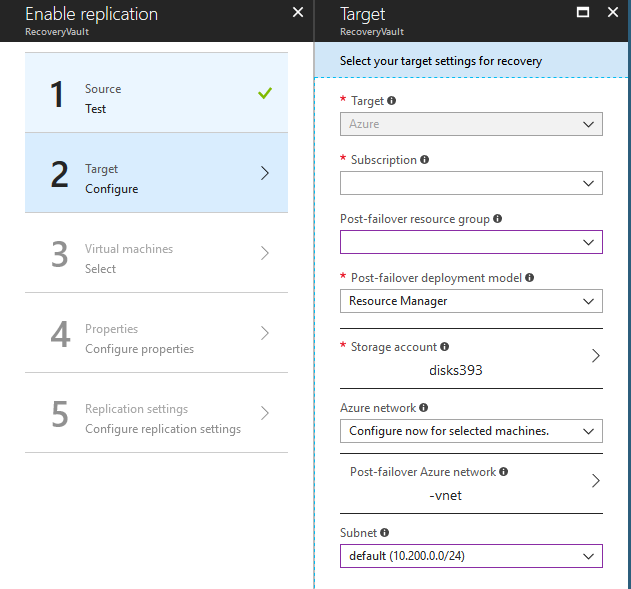
Next, let’s specify the subscription, resource group, network and subnet to use:
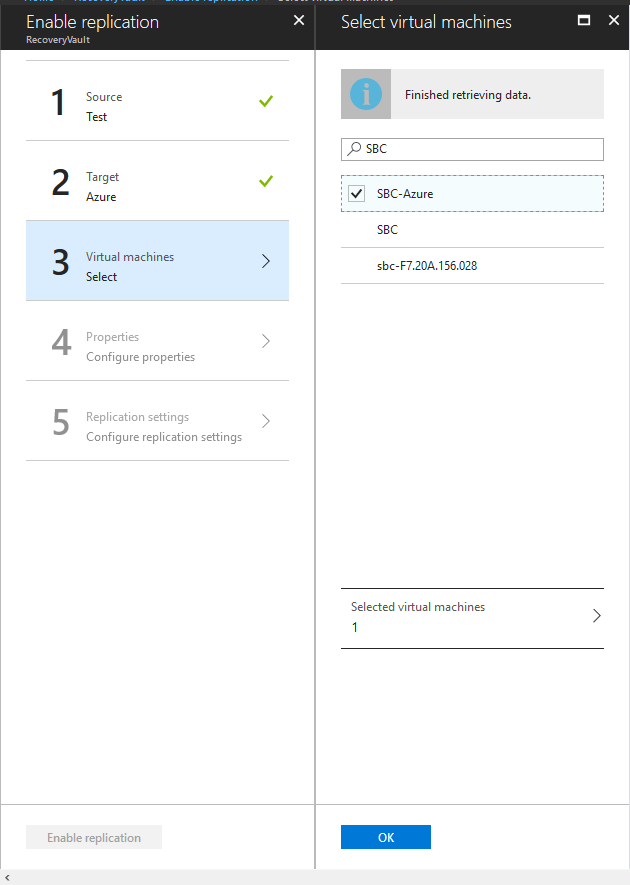
Now, let’s pick the SBC from the VMs running on the Hyper-V server (yours will be whatever it is called in Hyper-V):
Change the OS type to Linux:
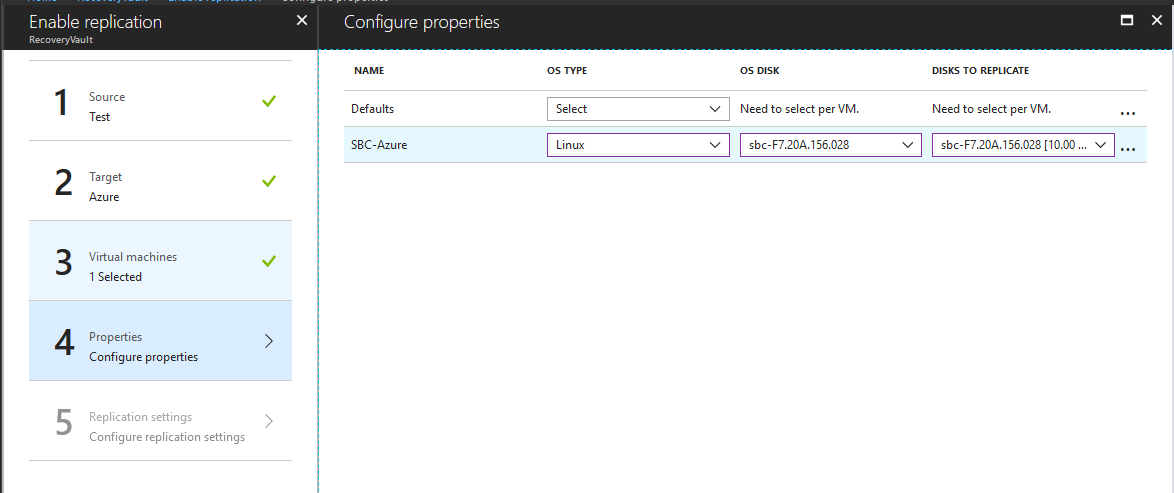
Finally, specify the replication policy we created earlier and click “Enable Replication”:
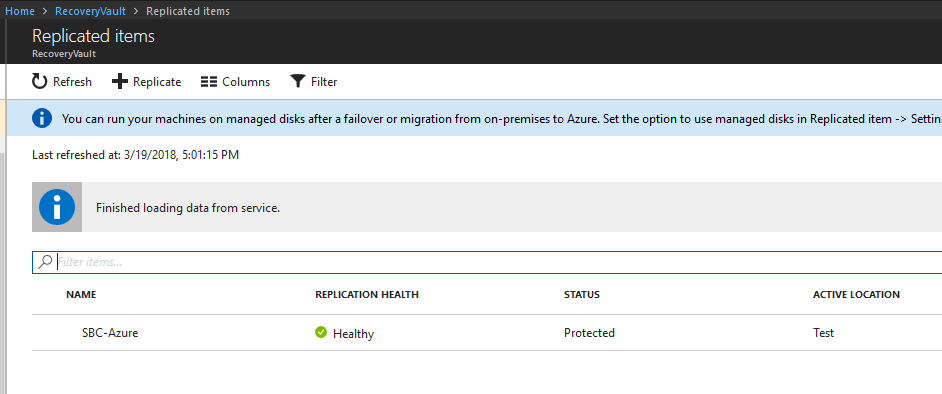
You will now see from the Hyper-V server the machine being uploaded to Azure:

Note: any further changes you make to the on-premises SBC will automatically get replicated to Azure automatically.
Step 7 - Failover SBC
Once the Hyper-V has finished sending the replica, we need to assign the IP addresses for Azure (as the current IP addresses won’t likely match). To do this, locate the SBC under replicated items:
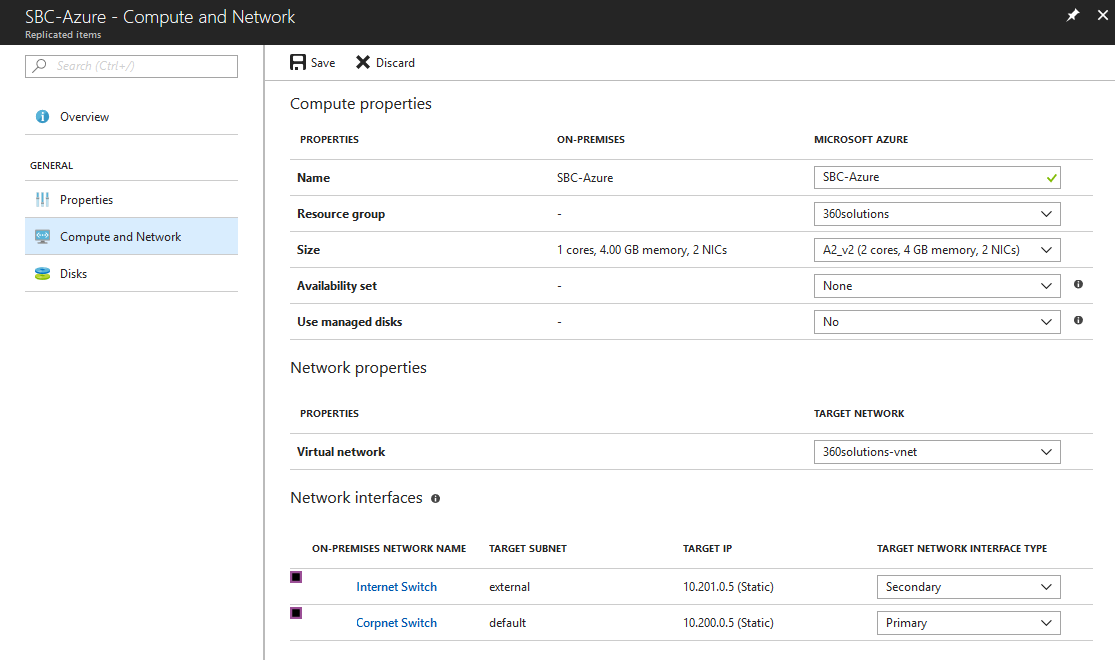
Select the SBC and go to Compute and Network. Under here, we need to specify the network interfaces. In our scenario, I’ve selected the on-premises LAN (Corpnet) network as the Primary and to map to the LAN (default) subnet in Azure. With the on-premises (Internet) network, I’ve mapped this as the Secondary and to the DMZ (external) subnet. With both I’ve assigned a free, static IP address - doing this the SBC will get its IP addresses changed to these and we don’t rely on DHCP:
We can finally replicate now. Under Overview, select Test Failover to start. I prefer to run a test and make sure the SBC is bootable etc. Once you know this is the case, we can do a full migration.

Once the failover is complete (shouldn’t take more than 5-10 minutes), we should now be able to access the SBC on its new IP address - I have a Windows 10 machine on the same subnet as it:
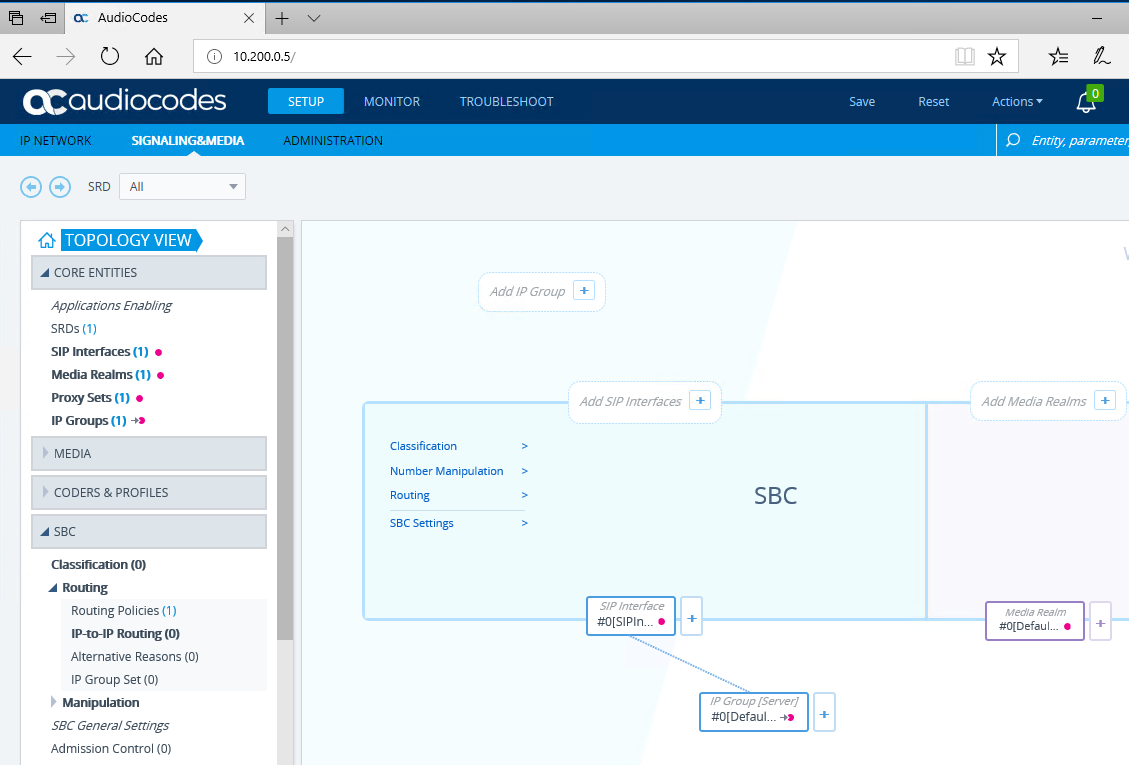
Just make sure you can log in to it OK, but don’t make any changes at this stage.
Step 8 - Complete Migration
We now know the SBC boots in Azure on the correct IP address.
Note: during this time the on-premises SBC is still running happily on its own IP address.
If we now go to Replicated Items again and locate the SBC. This time select Cleanup test failover to remove the test VM we created:

Once complete, select Planned Failover. Once complete you should be able to log back into the SBC in Azure again. If all is well, select Complete Migration.
Note: this time the SBC on-premises will be shut down, but not deleted.
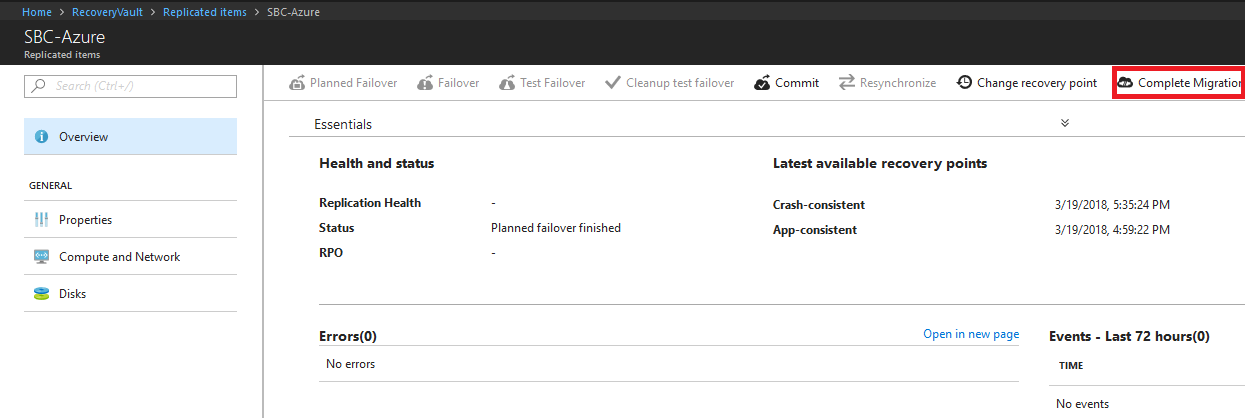
Step 9 - Configure external access for SBC
Whilst the LAN side will be working, the DMZ side will need some configuration.
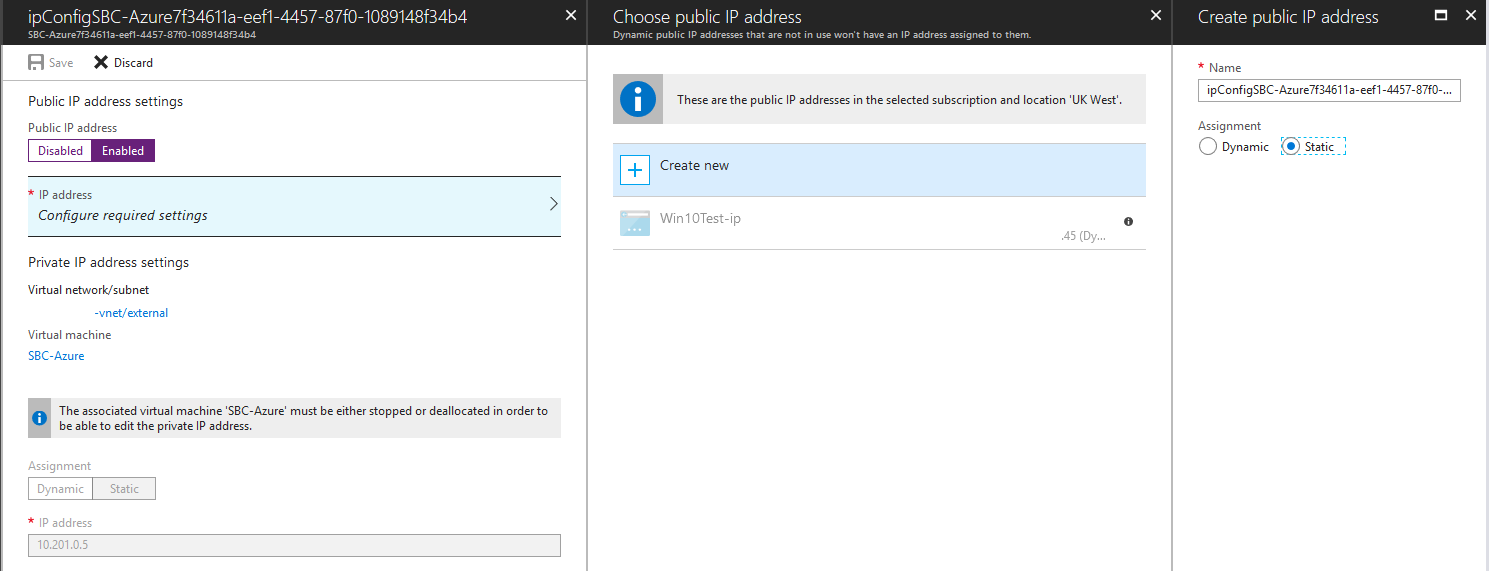
First, let’s configure a static IP address to it. Find the virtual machine in Azure, select the interface with the DMZ subnet and under IP Configurations, assign a public IP address:
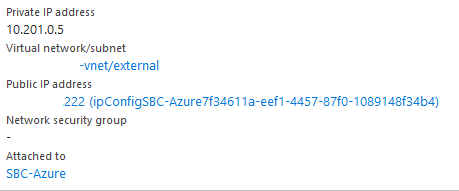
You will now have a public IP address assigned to it:
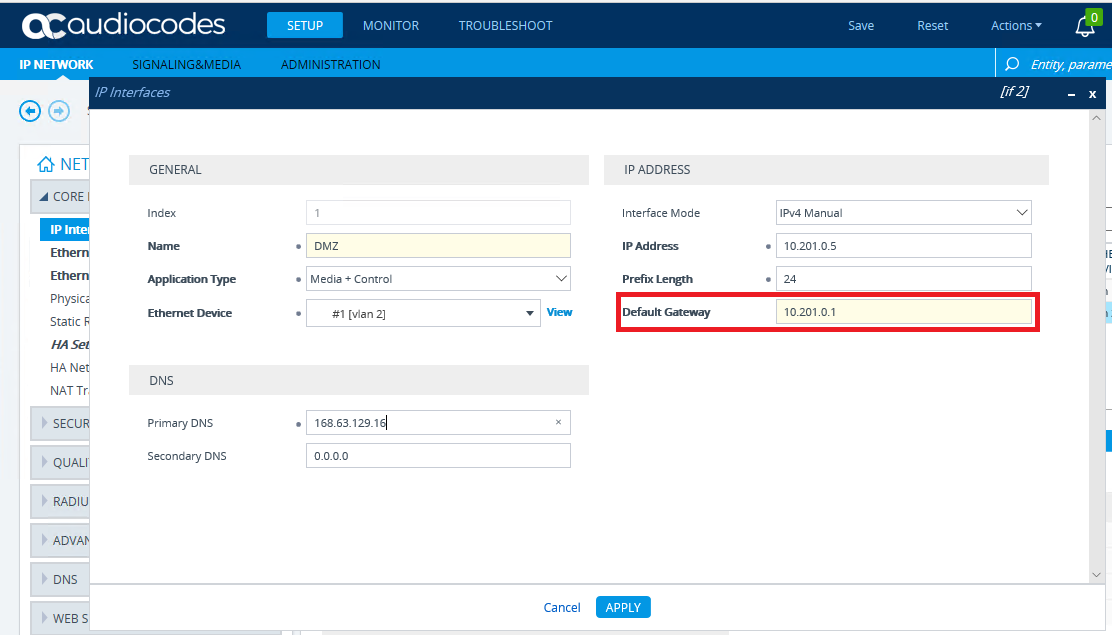
Next, we need to configure the SBC. First, let’s add a default gateway to the DMZ interface. Navigate to Setup -> IP Network -> Core Entities -> IP Interfaces. Add the default gateway for the subnet (should be .1):
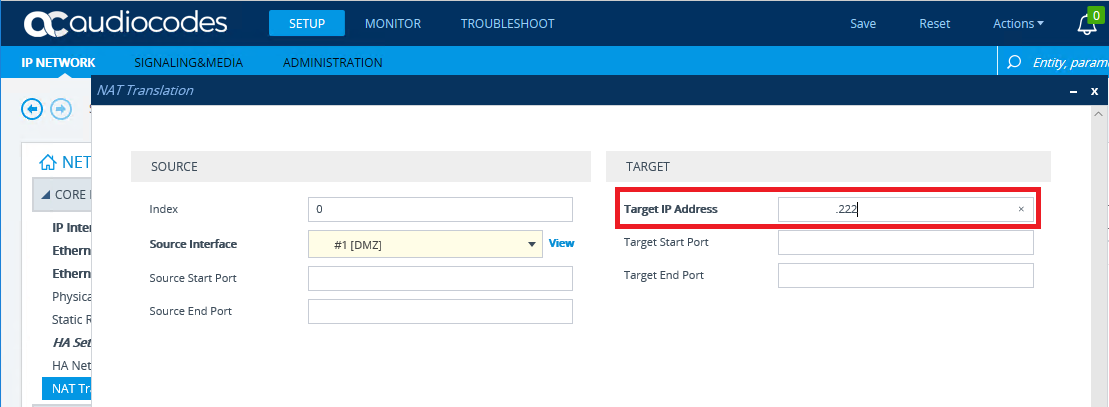
Still under Core Entities, we need to enter the NAT address to the SBC. This is configured so when any traffic leaves the DMZ interface, it sends the public IP address and not its own private address:
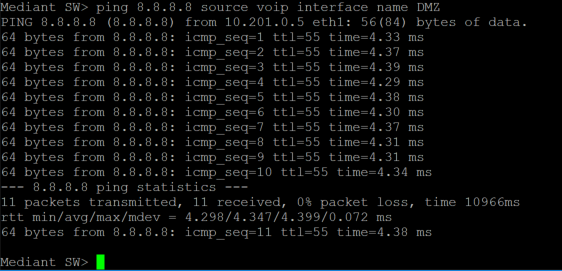
Now if we SSH on to the SBC, we should be able to reach the internet:
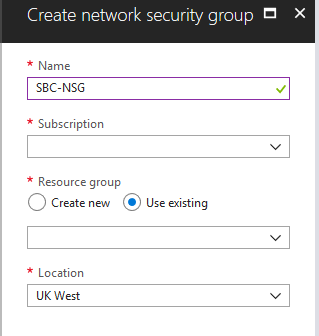
Finally, back in Azure, we need to allow ports to and from the SBC. To do this, we will create a Network Security Group (NSG). An NSG is essentially a list of firewall rules. The easiest way is to click the + top left and search for it:
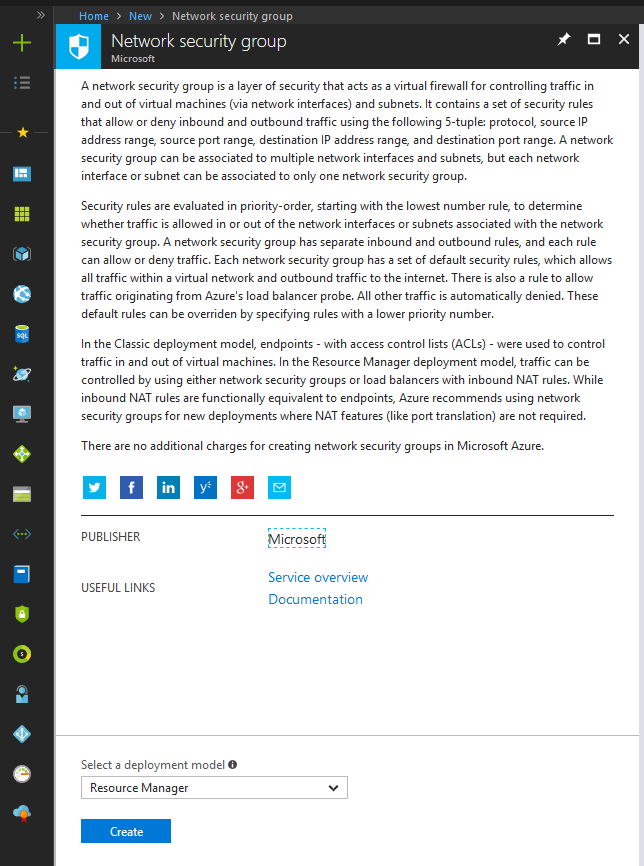
Give it a name, resource group, subscription and location:
Go to the created NSG. We now need to add some inbound and outbound security rules. In my scenario, I’ve allowed UDP 5060 for SIP signalling and UDP 6,000-40,000 for media. Ideally, you would tie this down to the SIP providers and your SBC IP addresses and the ports you require:

Now all that’s left to do is associate this NSG to the DMZ interface of the SBC:

Step 10 - Configure SBC
Now you should be ready to configure the SBC itself like you normally would on-premises. I won’t go into detail on how to do this here.
Recap
For something that I said was easy, there is quite a lot there, but most of the time it is just clicking through menus and waiting for Azure to do its magic. As I promised, there was no converting of files, uploading to blob storage or praying that it worked and having to start over again (and again).
In theory, this could also be done with on-premises VMWare and use ASR, but I’ve never tried.
Hope this helps. If I’ve missed something or you think it can be done in a better way, get in touch.
